OK so as many of you already noticed, the stock horn leaves a lot to be desired. This is a "how to" on changing the horns....
First off you need the replacements... I chose Hella Supertones.
http://www.fixthisride.com/showproductdeta...p?prod_id=89724
And then a little electrical know how. First off, remove the front grille. There are 6 plastic screw looking clips at the top of the grille insert (circled in RED). Just give them a quarter turn counterclockwise and they should let loose.

Then work your way to the actual bumper cover and remove the two 10mm bolts (1 on each side) (circled in green)

And now is where you have to be extra careful not to pull too hard and crack the paint....
Lift the two corners of the front bumper cover over the tabs and gently pull the grille insert away from the radiator, pulling here...
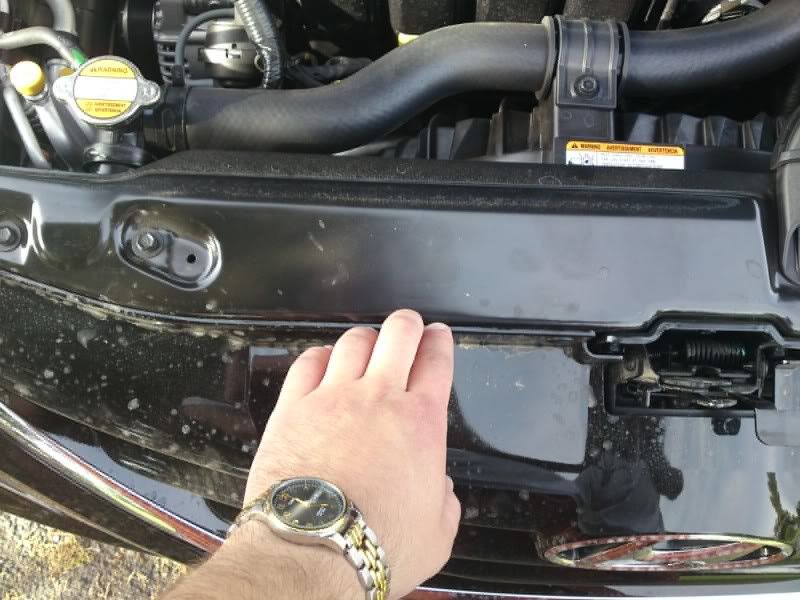
reach your hand down in the gap and remove the 4 screws. Located behind the grille roughly where i circled in blue...

It is pretty easy with this tool..

once the 4 screws are removed the grille insert should just pull out towards you. leaving this...
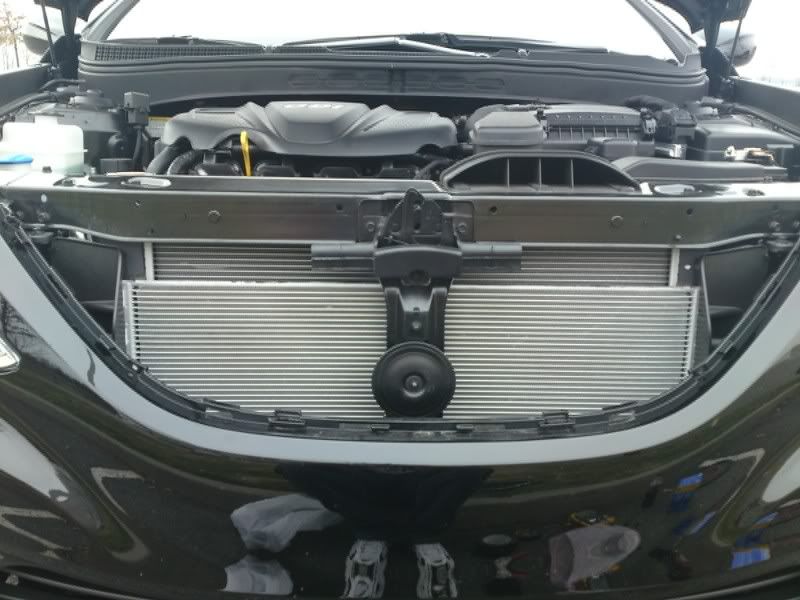
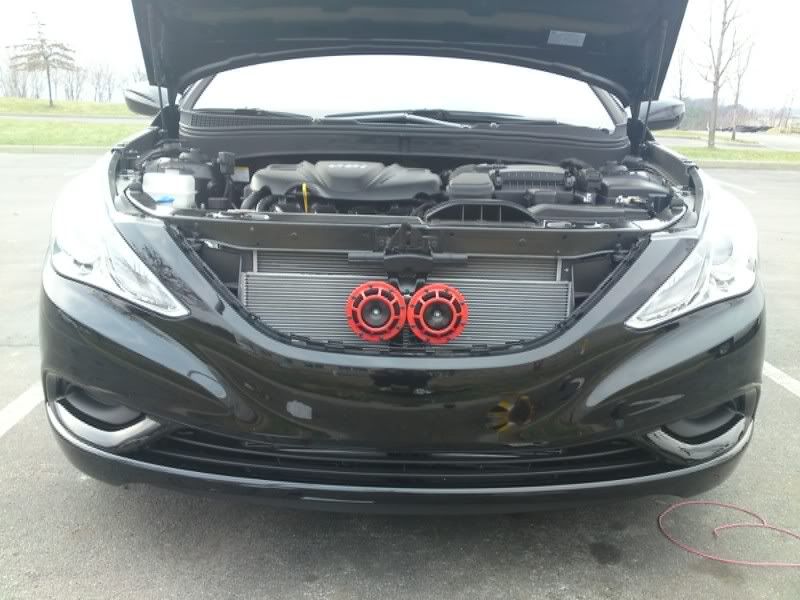
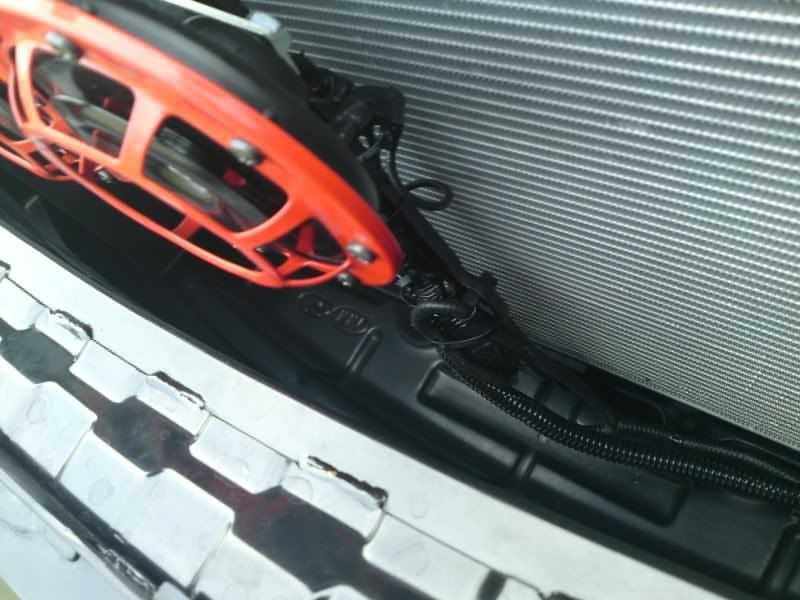
notice the single stock 110dB horn Remove that. It has a black clip at the bottom with a release tab. Once removed, throw away horn or keep for later. install BOTH of the new horns on the same original mounting stud. I used blue medium strength loctite to secure the extra load.
NOW the fun begins. This part (the wiring)can be done MANY different ways so i am going to leave this section somewhat vague. I ohmed out the stock connector and to my surprise, the green wire was actually not ground. It is the hot/positive lead. and the black is negative. I didn't want to cut or splice into the stock wiring so i rigged up a connector. i took a forked lug connector and cut off one of the forks

These fit perfectly into the stock connector. Make sure to do a thourough but tidy electrical tape job so that none of the wires short and so that no bare metal is showing. Remeber this is where all the rain and puddle water goes. You don't want this to get all wet and corrode. A wiring diagram for the Automotive relay and the actual relay both come with the horns. Follow the wiring diagram. I believe it's diagram 2b with these particular horns. I'm not going to explain the exact wiring because it should be done by someone that can read a diagram, and i don't want to be responsible if someone doesn't fully understand my explanation and does permanent damage. But i will say it's very easy. Once done wiring the relay, run the last 2 wires back to the battery and use cable ties to neaten up the area... I also used wire loom to make it look completely stock-like
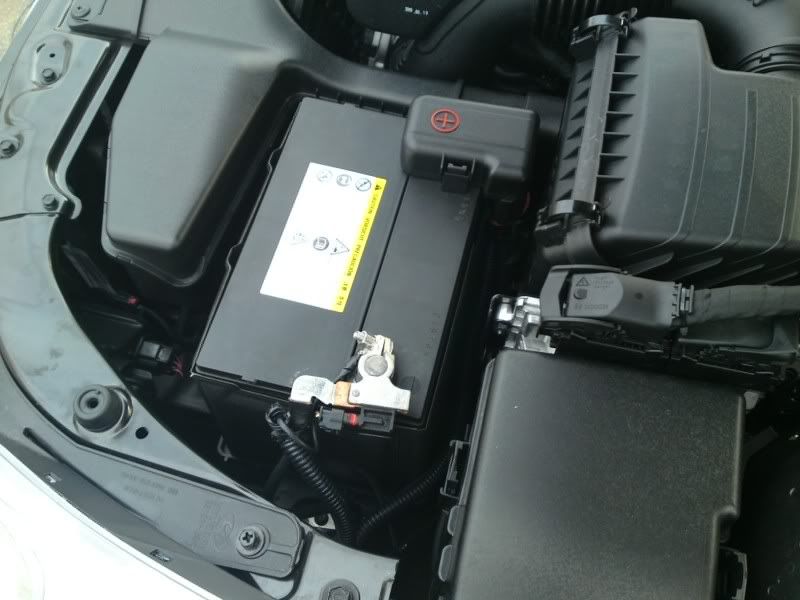
i took the last 2 wires,in loom, to the battery and attached them to the terminal. The black wire is barely noticeable on the battery and the red is completely covered by the plastic terminal cover. To keep consistent with being neat.
This is my first DIY, so if there are any improvements you would like me to make, i will try, and yes, i know it is somewhat vague in parts, but like i said, the parts that are left out should be common sense, and if they aren't i don't want to be responsible for your mistakes. Hope this helps!!
Before 110dB
After 120dB
A world of difference
First off you need the replacements... I chose Hella Supertones.
http://www.fixthisride.com/showproductdeta...p?prod_id=89724
And then a little electrical know how. First off, remove the front grille. There are 6 plastic screw looking clips at the top of the grille insert (circled in RED). Just give them a quarter turn counterclockwise and they should let loose.

Then work your way to the actual bumper cover and remove the two 10mm bolts (1 on each side) (circled in green)

And now is where you have to be extra careful not to pull too hard and crack the paint....
Lift the two corners of the front bumper cover over the tabs and gently pull the grille insert away from the radiator, pulling here...

reach your hand down in the gap and remove the 4 screws. Located behind the grille roughly where i circled in blue...

It is pretty easy with this tool..

once the 4 screws are removed the grille insert should just pull out towards you. leaving this...

notice the single stock 110dB horn
Remove that. It has a black clip at the bottom with a release tab. Once removed, throw away horn or keep for later. install BOTH of the new horns on the same original mounting stud. I used blue medium strength loctite to secure the extra load.
NOW the fun begins. This part (the wiring)can be done MANY different ways so i am going to leave this section somewhat vague. I ohmed out the stock connector and to my surprise, the green wire was actually not ground. It is the hot/positive lead. and the black is negative. I didn't want to cut or splice into the stock wiring so i rigged up a connector. i took a forked lug connector and cut off one of the forks

These fit perfectly into the stock connector. Make sure to do a thourough but tidy electrical tape job so that none of the wires short and so that no bare metal is showing. Remeber this is where all the rain and puddle water goes. You don't want this to get all wet and corrode. A wiring diagram for the Automotive relay and the actual relay both come with the horns. Follow the wiring diagram. I believe it's diagram 2b with these particular horns. I'm not going to explain the exact wiring because it should be done by someone that can read a diagram, and i don't want to be responsible if someone doesn't fully understand my explanation and does permanent damage. But i will say it's very easy. Once done wiring the relay, run the last 2 wires back to the battery and use cable ties to neaten up the area... I also used wire loom to make it look completely stock-like

i took the last 2 wires,in loom, to the battery and attached them to the terminal. The black wire is barely noticeable on the battery and the red is completely covered by the plastic terminal cover. To keep consistent with being neat.

This is my first DIY, so if there are any improvements you would like me to make, i will try, and yes, i know it is somewhat vague in parts, but like i said, the parts that are left out should be common sense, and if they aren't i don't want to be responsible for your mistakes. Hope this helps!!
Before 110dB
After 120dB
A world of difference