

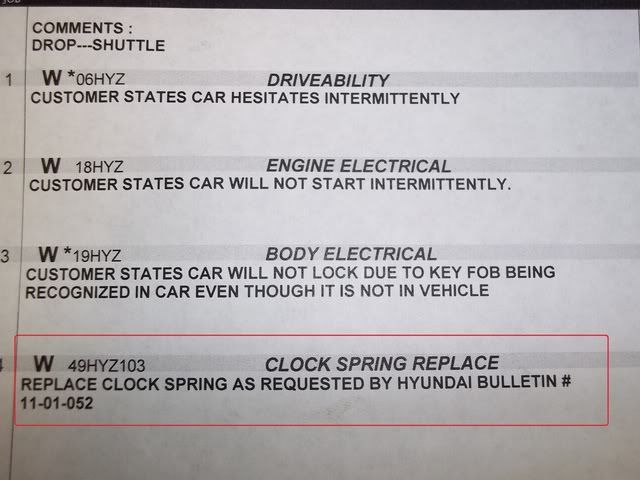
I have received a lot of question about this topic, not particular to this model but just in general. Soooo the next vehicle I had to perform the campaign on was a donor for this post. In this post I will explain the function and process for replacing a clock spring. Keep in mind we're working on a veracruz here, but all other models are very similar.
![Image]()
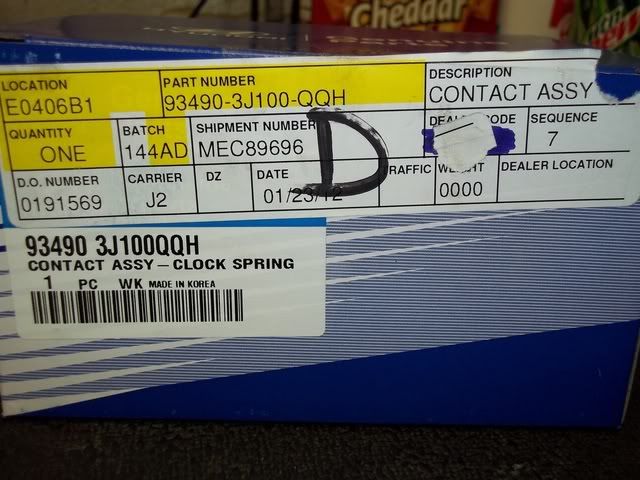
Now that we know we're doing it; let's look at the new part!
![Image]()
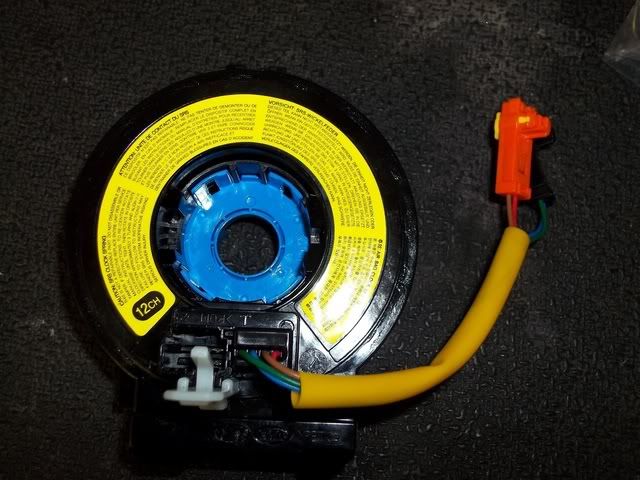
And as we open it this is what we find...
![Image]()
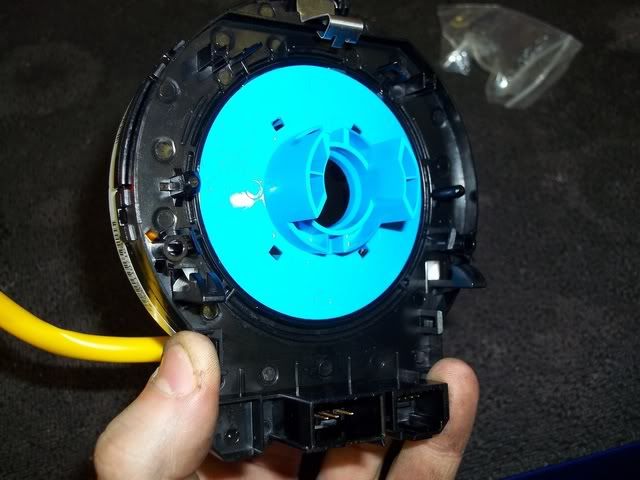
When flipped over...
![Image]()
So that's the new part you'll receive. This part maintains an electrical contact with components on the steering wheel such as horn, cruise, radio, and the Air Bag. If you look again, two connectors from the dash harness interlock near the bottom, and the two connectors on front (one has a pigtail) rotate with the steering wheel.
Looks like it might be difficult to replace? Not at all....here's the tools required
![Image]()
Phillips #2 Screwdriver, 22MM socket, T40 Torx, and not pictured but a pocket screwdriver
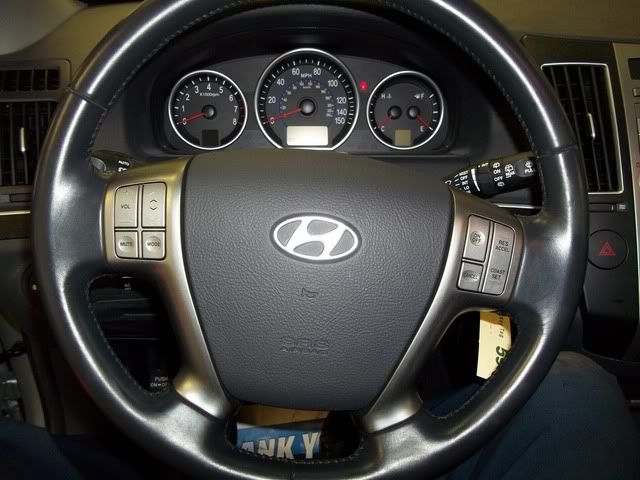
So here's what it looks like once we get into the vehicle right..
![Image]()
First step is to disable the SRS system; do this by disconnecting battery ground for 5 minutes. This allows the capacitors in the SRSCM to drain.
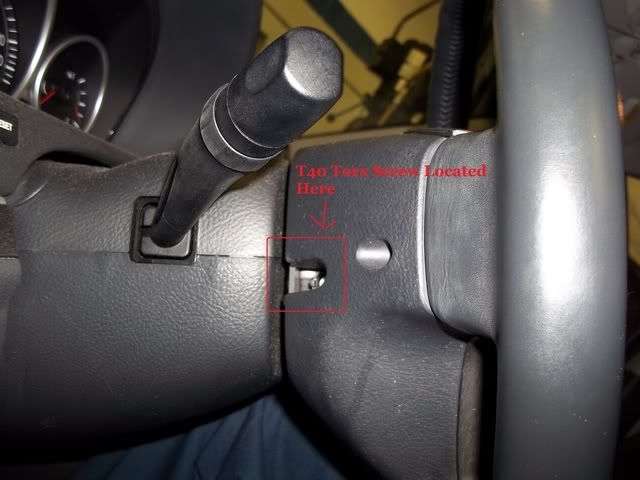
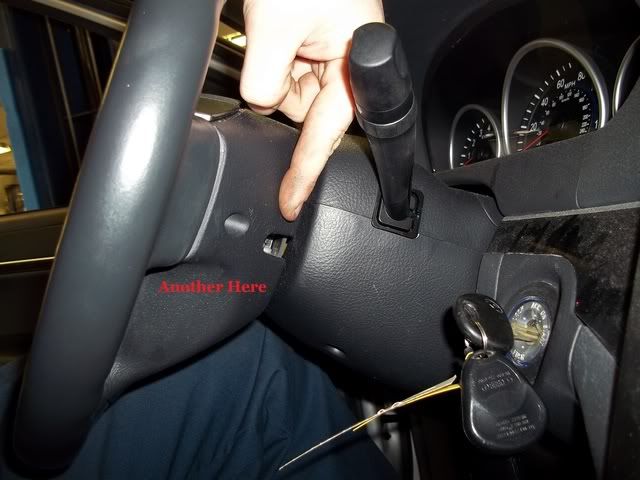
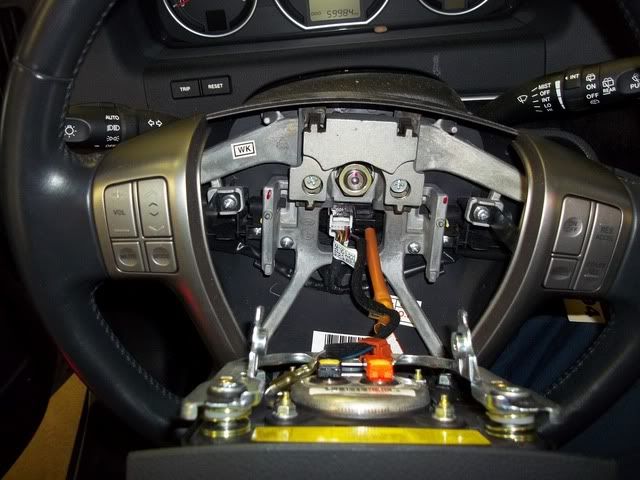
Next is to remove the driver's air bag....two T-40 screws attach the bag to the wheel. These screws ALWAYS STAY IN THE WHEEL....no need to go fishing for them; just unscrew all the way and wiggle the bag towards you
![Image]()
![Image]()
![Image]()
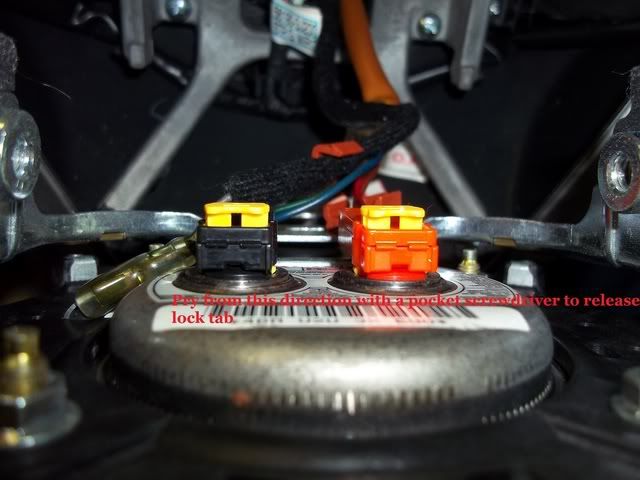
This is what you will find; there are three attachment points on the bag; the horn (small ground tab), and the primary and secondary squib connections. The horn connector simply slides off the tab; the squib connections have a locking device on them. Simply pry the yellow up with a screwdriver to release------>Shown in picture below!
![Image]()
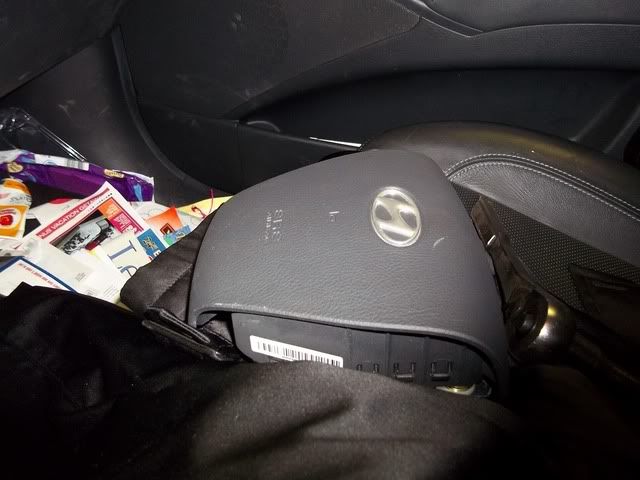
Now just wiggle the actual connector body from the explosive and set aside. To properly store an air bag place it as depicted in the following photo.
![Image]()
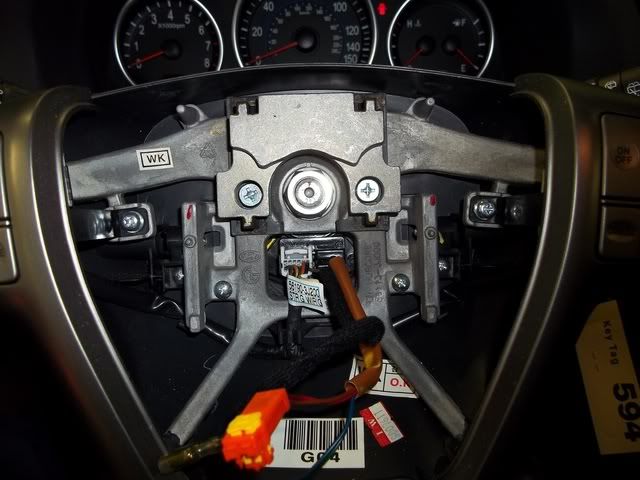
Now this is what you are left with!
![Image]()
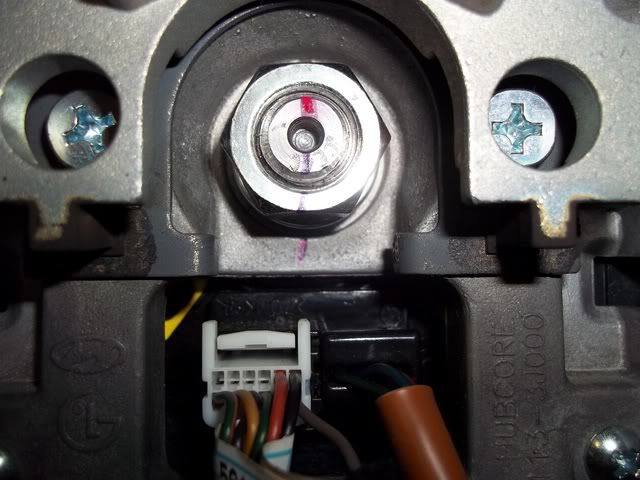
This is when you use a marker or paint pen to mark the steering wheel nut, shaft, and body for re-installation purposes. While you're there, unplug the steering wheel via the white connector on the left.
![Image]()
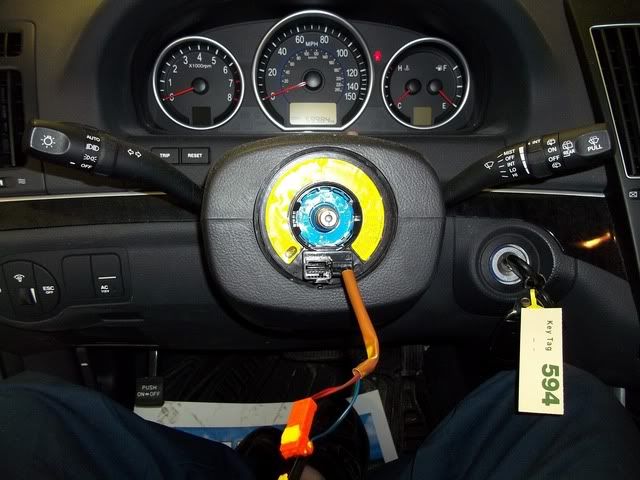
Utilize a steering wheel puller if you wish, or use a slight amount of force to wiggle the steering wheel left and right eventually pulling it straight off
This is what you will see then
![Image]()
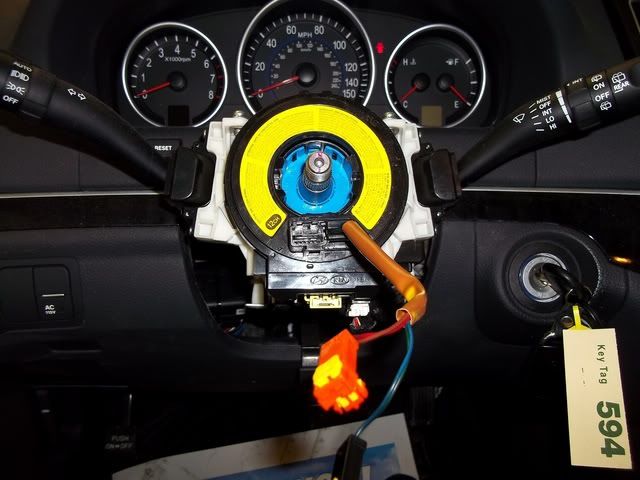
On the Veracruz there are three phillips that hold the bezels to the column, remove them. They are installed from the bottom. If this were a CM Santa Fe there would be three below, and two going into the column. After screws are removed gently pry the two halves apart being careful not to mar the plastic.
![Image]()
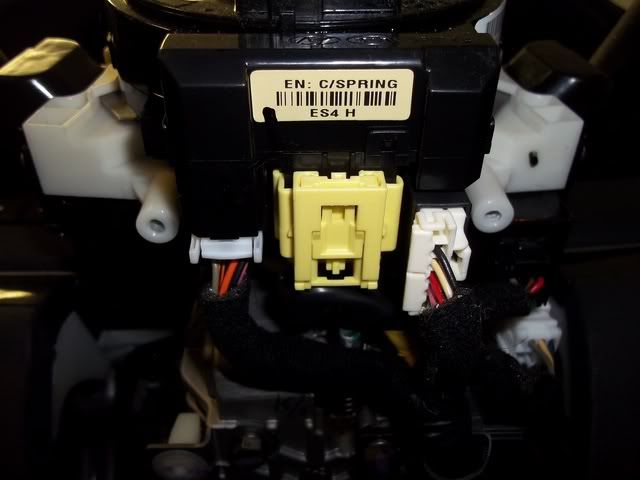
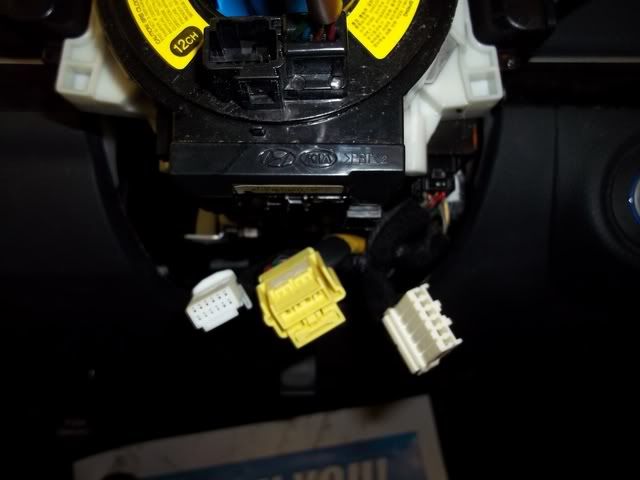
Now to remove the clock spring; we must unplug all connections from this. Going from left to right we have: Steering wheel mounted controls/horn, SRS, and Steering Angle Sensor which I will now refer to as the SAS
![Image]()
Unplug the outer two as any other connector, the SRS has a slide which you must push back (towards the grille of the car) to release
![Image]()
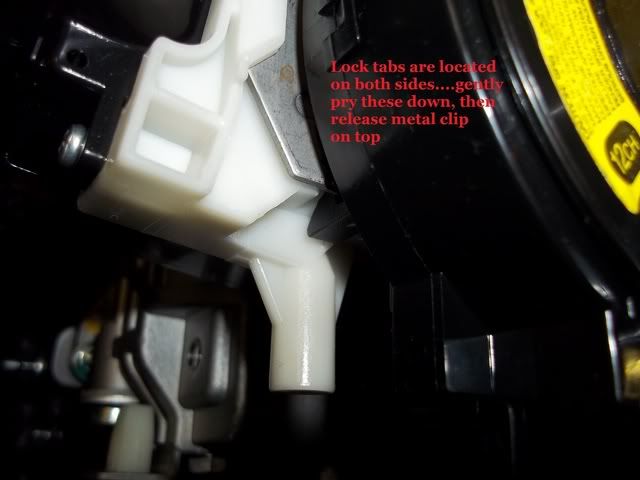
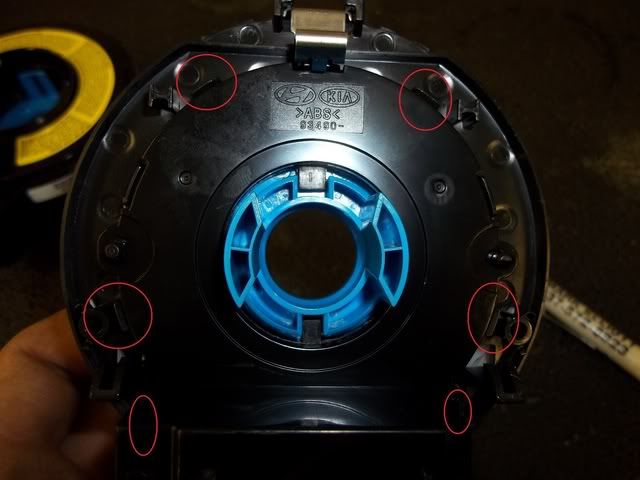
Now what holds that thing on?? Two small black clips on either side near the bottom, and one metal tab on top. Remove the two on the bottom working one side at a time, then the top. Here's a close up of a clip on bottom
![Image]()
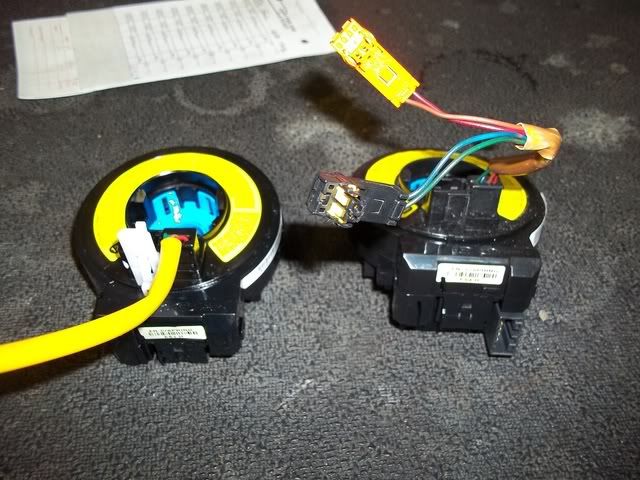
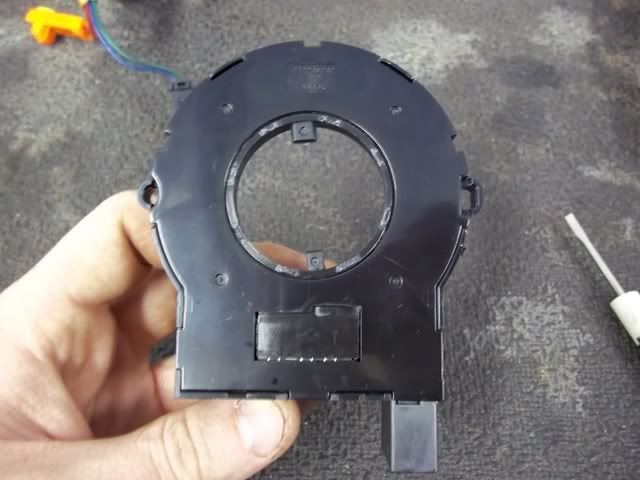
And we have two clock springs! What's the difference between the two??
![Image]()
We must swap the SAS from the old unit to the new one!
Six tabs hold it on; if they break don't worry, that part is now a paperweight
![Image]()
An outline of all clips
![Image]()
And we have a SAS
![Image]()
Now simply clip this onto the new Clock Spring being careful not to move the interior slide from it's current position. Re-install the clock spring starting with a lower clip, followed by the other one, and finishing up with the top metal clip. The rest of the installation is a breeze!
Keep in mind, this is an SRS system and I am a trained technician. This only outlines how this part is replaced and what it is and does. I am not liable for you repairing vehicles on your own. Additionally, it is reccommended that you use a tool such as Hyundai's GDS to re-establish the SAS set point after repair.
Hope this clears up a lot of confusion!! Feel free to ask more questions!
Now that we know we're doing it; let's look at the new part!
And as we open it this is what we find...
When flipped over...
So that's the new part you'll receive. This part maintains an electrical contact with components on the steering wheel such as horn, cruise, radio, and the Air Bag. If you look again, two connectors from the dash harness interlock near the bottom, and the two connectors on front (one has a pigtail) rotate with the steering wheel.
Looks like it might be difficult to replace? Not at all....here's the tools required
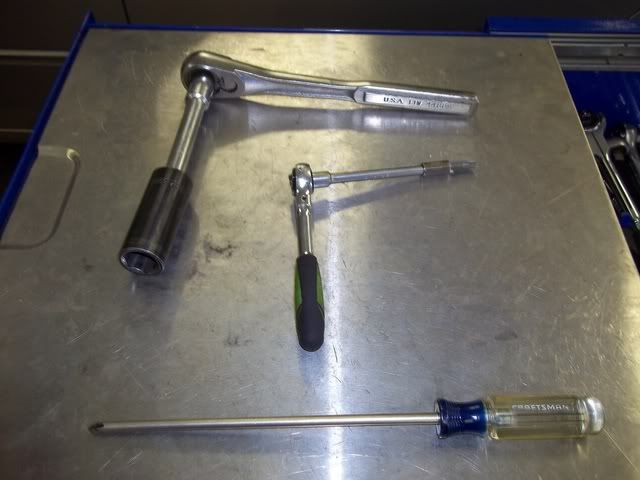
Phillips #2 Screwdriver, 22MM socket, T40 Torx, and not pictured but a pocket screwdriver
So here's what it looks like once we get into the vehicle right..
First step is to disable the SRS system; do this by disconnecting battery ground for 5 minutes. This allows the capacitors in the SRSCM to drain.
Next is to remove the driver's air bag....two T-40 screws attach the bag to the wheel. These screws ALWAYS STAY IN THE WHEEL....no need to go fishing for them; just unscrew all the way and wiggle the bag towards you
This is what you will find; there are three attachment points on the bag; the horn (small ground tab), and the primary and secondary squib connections. The horn connector simply slides off the tab; the squib connections have a locking device on them. Simply pry the yellow up with a screwdriver to release------>Shown in picture below!
Now just wiggle the actual connector body from the explosive and set aside. To properly store an air bag place it as depicted in the following photo.
Now this is what you are left with!
This is when you use a marker or paint pen to mark the steering wheel nut, shaft, and body for re-installation purposes. While you're there, unplug the steering wheel via the white connector on the left.
Utilize a steering wheel puller if you wish, or use a slight amount of force to wiggle the steering wheel left and right eventually pulling it straight off
This is what you will see then
On the Veracruz there are three phillips that hold the bezels to the column, remove them. They are installed from the bottom. If this were a CM Santa Fe there would be three below, and two going into the column. After screws are removed gently pry the two halves apart being careful not to mar the plastic.
Now to remove the clock spring; we must unplug all connections from this. Going from left to right we have: Steering wheel mounted controls/horn, SRS, and Steering Angle Sensor which I will now refer to as the SAS
Unplug the outer two as any other connector, the SRS has a slide which you must push back (towards the grille of the car) to release
Now what holds that thing on?? Two small black clips on either side near the bottom, and one metal tab on top. Remove the two on the bottom working one side at a time, then the top. Here's a close up of a clip on bottom
And we have two clock springs! What's the difference between the two??
We must swap the SAS from the old unit to the new one!
Six tabs hold it on; if they break don't worry, that part is now a paperweight
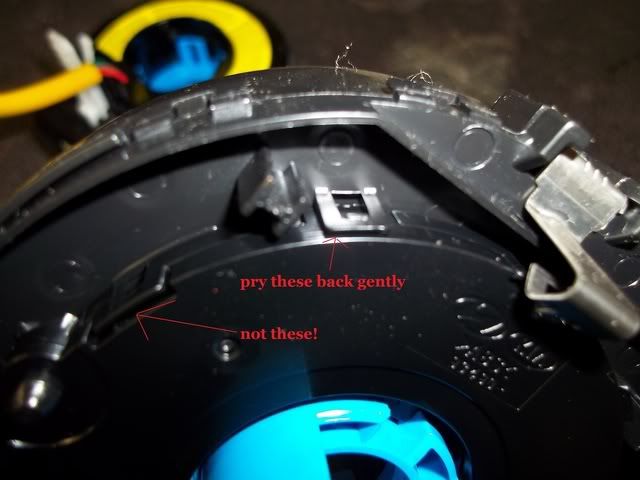
An outline of all clips
And we have a SAS
Now simply clip this onto the new Clock Spring being careful not to move the interior slide from it's current position. Re-install the clock spring starting with a lower clip, followed by the other one, and finishing up with the top metal clip. The rest of the installation is a breeze!
Keep in mind, this is an SRS system and I am a trained technician. This only outlines how this part is replaced and what it is and does. I am not liable for you repairing vehicles on your own. Additionally, it is reccommended that you use a tool such as Hyundai's GDS to re-establish the SAS set point after repair.
Hope this clears up a lot of confusion!! Feel free to ask more questions!


