

How's it going folks!
This past week I bought myself a Homelink Mirror and was searching all over this forum with help for the installation. While I did come across many posts describing how to's and such, there was no true write up, so I thought I'd do one!
Difficulty level: EASY; don't let your dealer install this (unless ofcourse, they're doing for it free!)
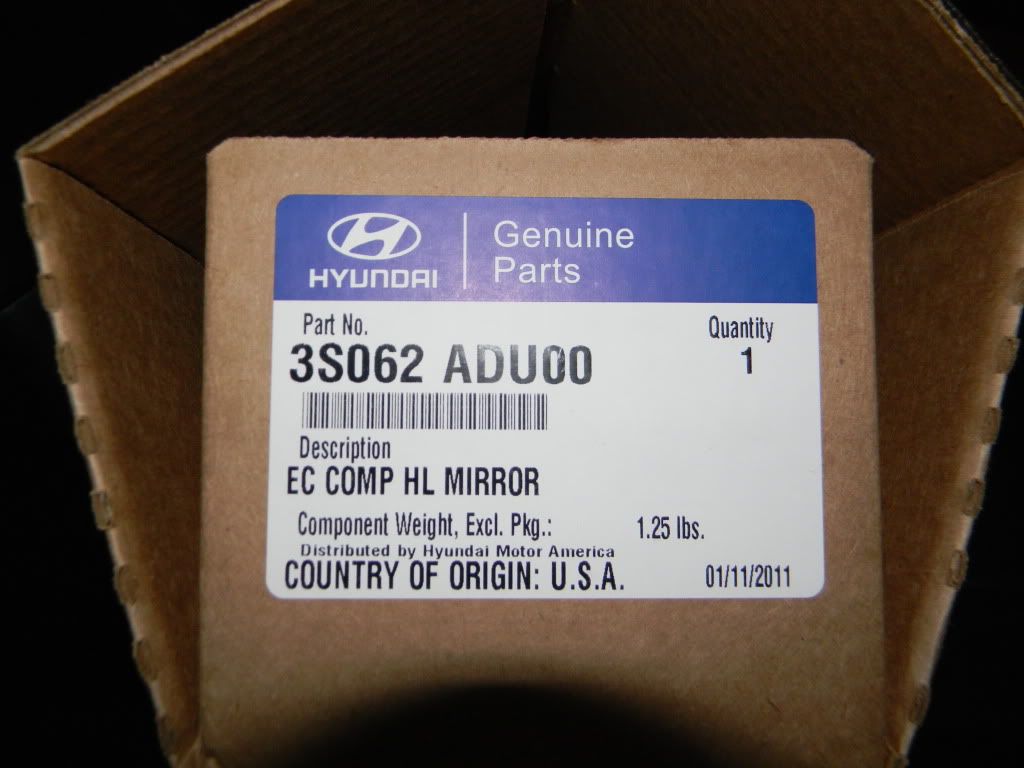
NOTE: This is a Genuine Hyundai Part, bought this from my dealership, it retailed at $200
![Image]()
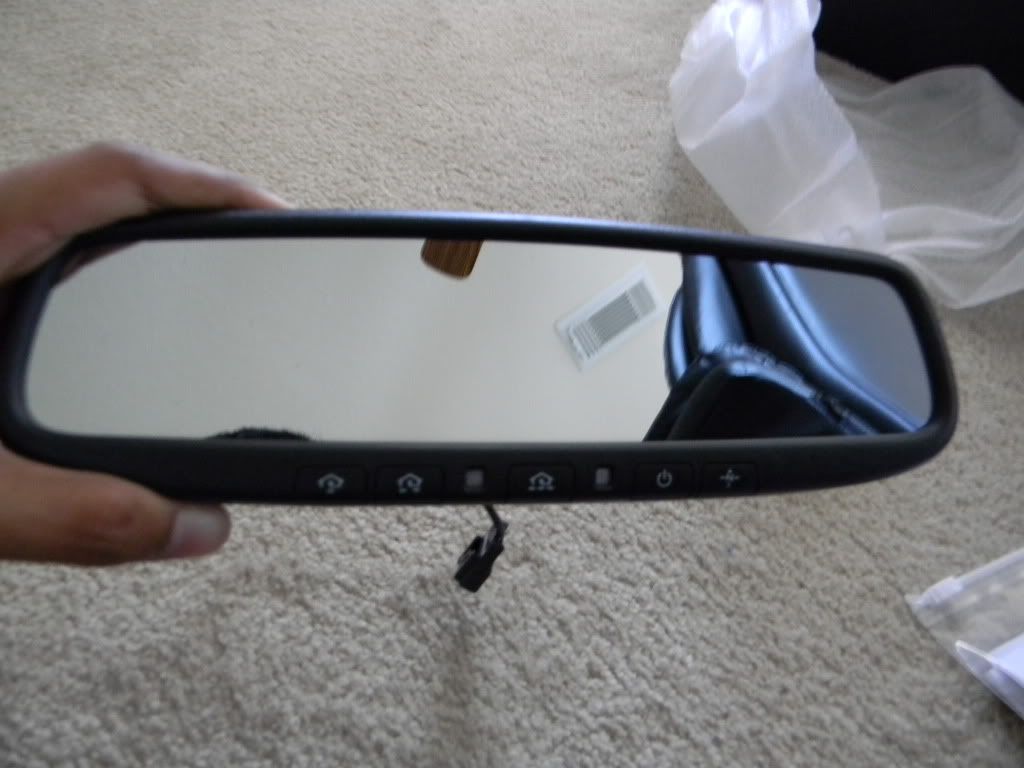
Okay, here are the parts. Here's the mirror, don't be fooled by that plug; this job is 99% plug and play, there's some tapping and crimping to do!
![Image]()
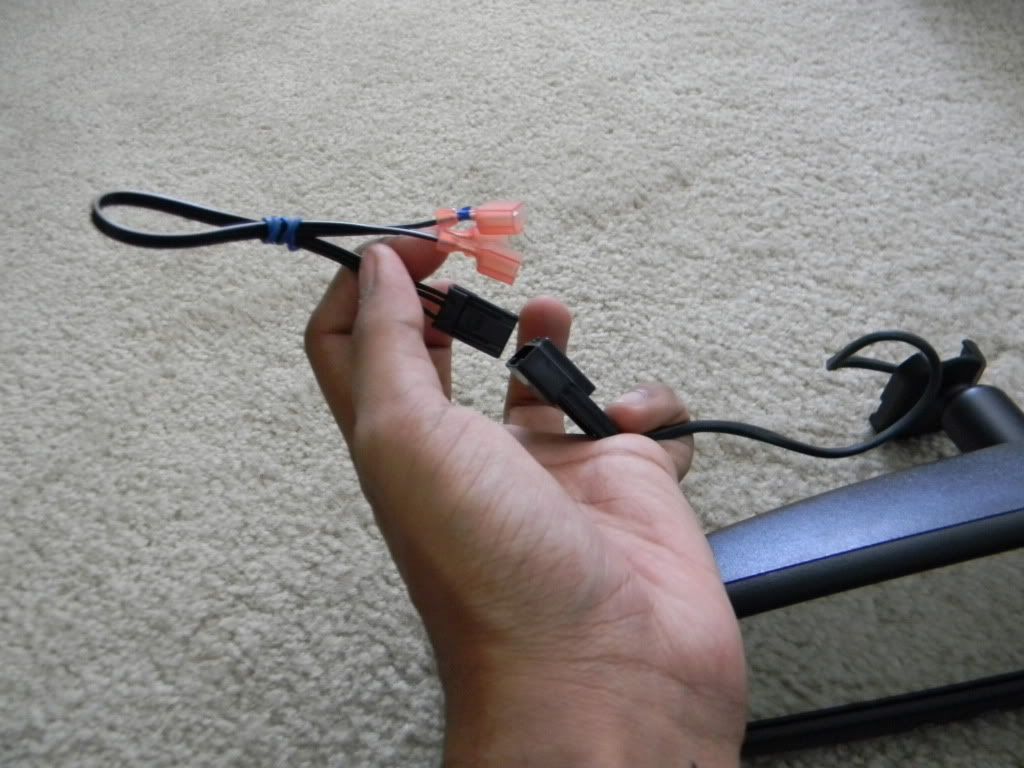
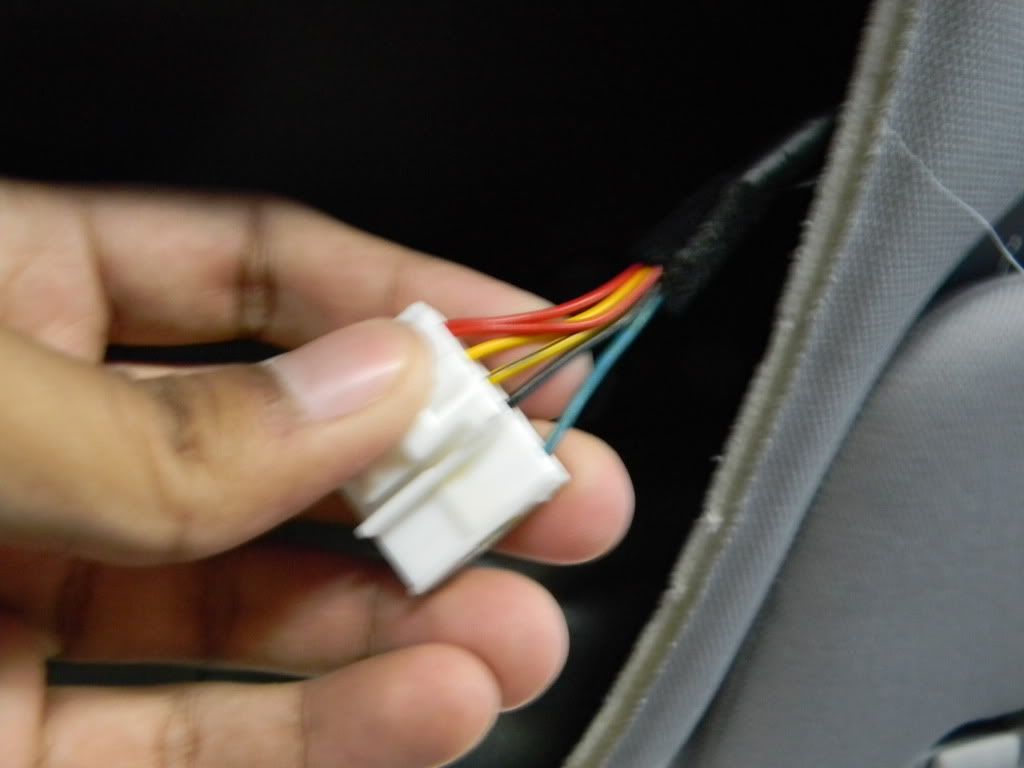
That plug connects to this wiring harness provided, so those 3 spade connectors you see hanging off will connect to the 3 T-Taps.
![Image]()
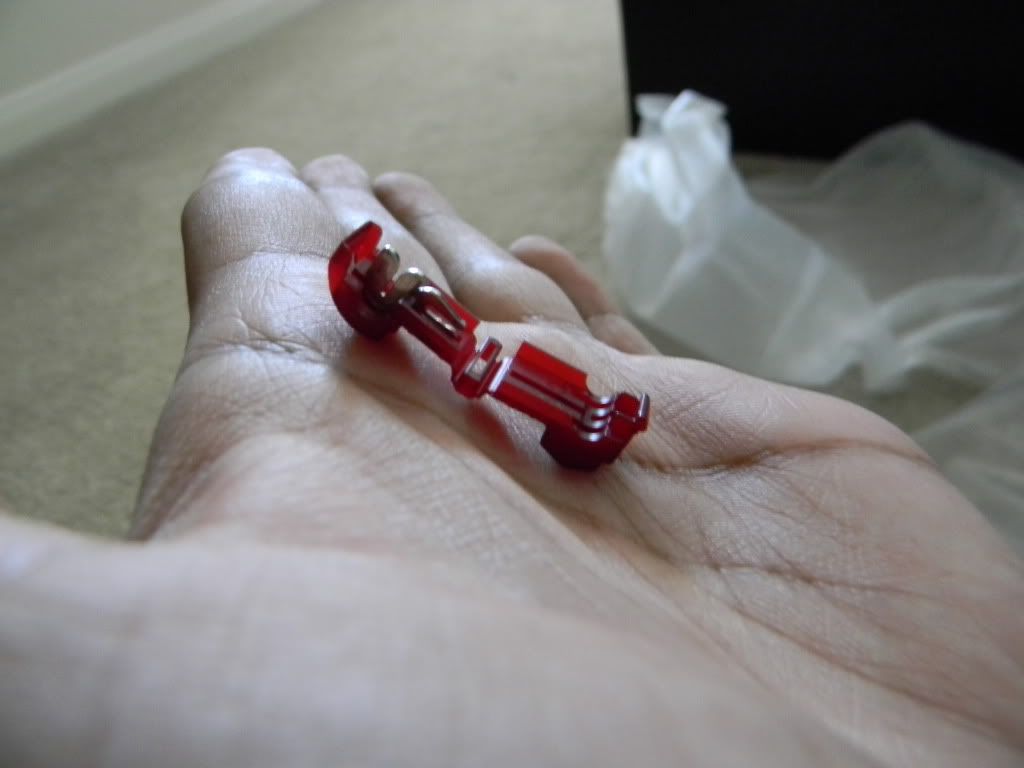
T-Taps. The original car wires go in the middle, then you close this T-Tap pinched with your pliers, so there is NO cutting or splicing involved.
![Image]()
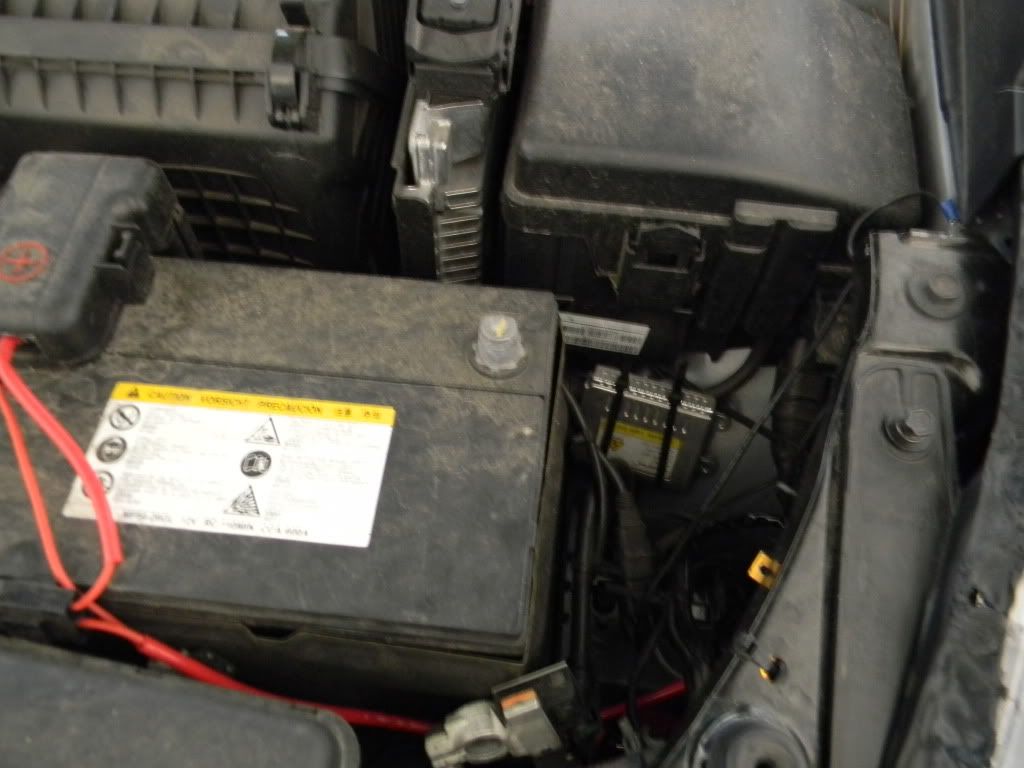
Now, take off your ground from the battery terminal
![Image]()
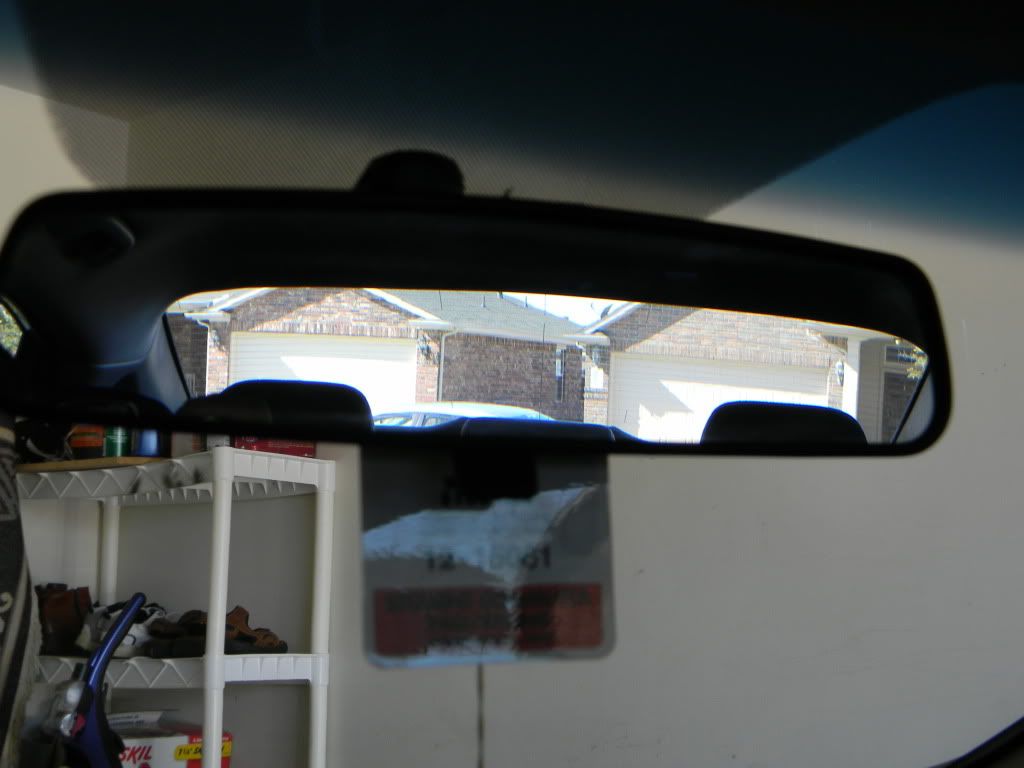
Take a good look at your plain mirror, as it'll be the last time you'll ever see it again! Atleast on your Sonata!
![Image]()
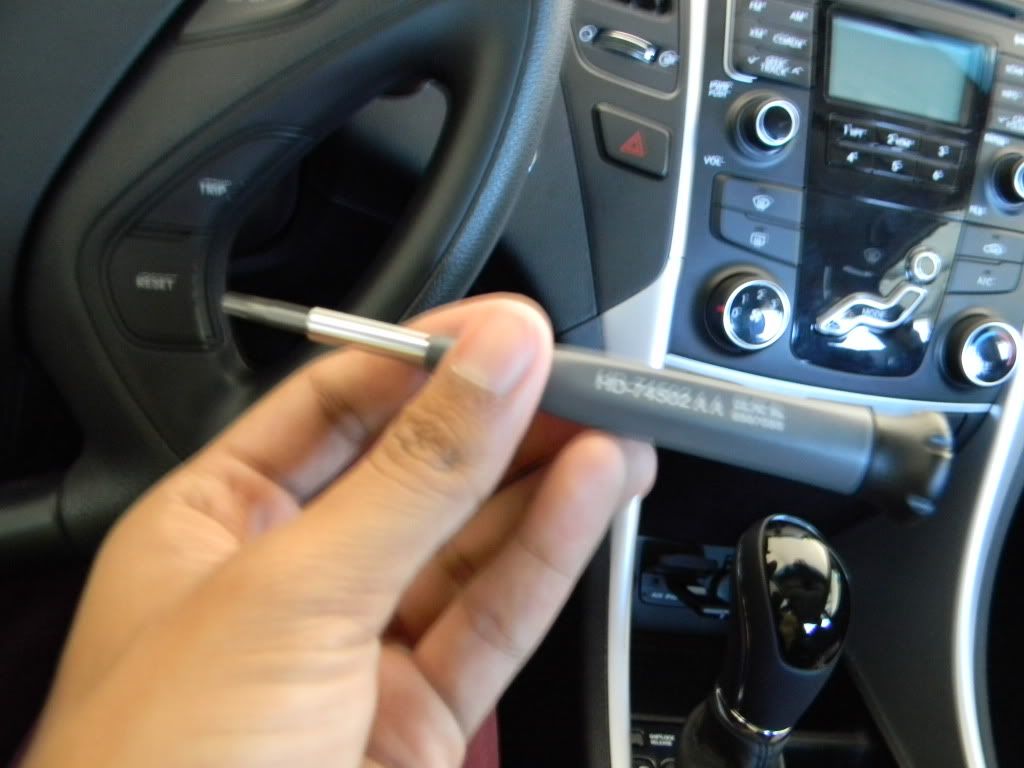
Now let's take the old mirror off, you're gonna need a Torx screwdriver to take the screw off underneath the mirror where it attaches to the windshield. I can't remember what number Torx but you head to HomeDepot and buy this tool, it comes with assorted sizes from #2-8 I believe. Used it to swap my XBOX360 hard drives out, came in handy again today. (Any 360 fans here?)
![Image]()
Once that screw is out, the mirror should be really loose and just pull forward and it should EASILY come out, leaving only the metal base plate stuck to the windshield. From here screw the electronic mirror on and tighten it up. Leave its power wire hanging for now.
Oh and at this point, if you forget to roll down the windows and they're tinted windows you obviously can't roll them down now since the battery cables out. The car will be dark so open the doors to let light in. I forgot about that lol.
![Image]()
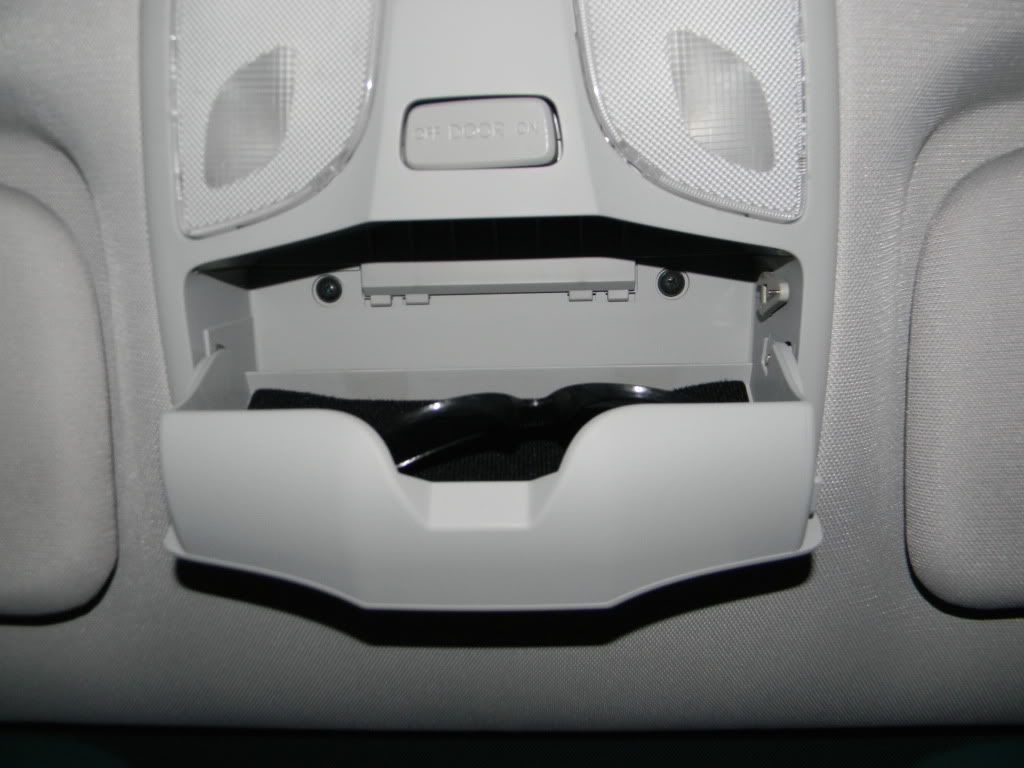
Now take out the sunglass holder/map lights. Take out your sunglasses and remove the 2 screws holding that panel in.
![Image]()
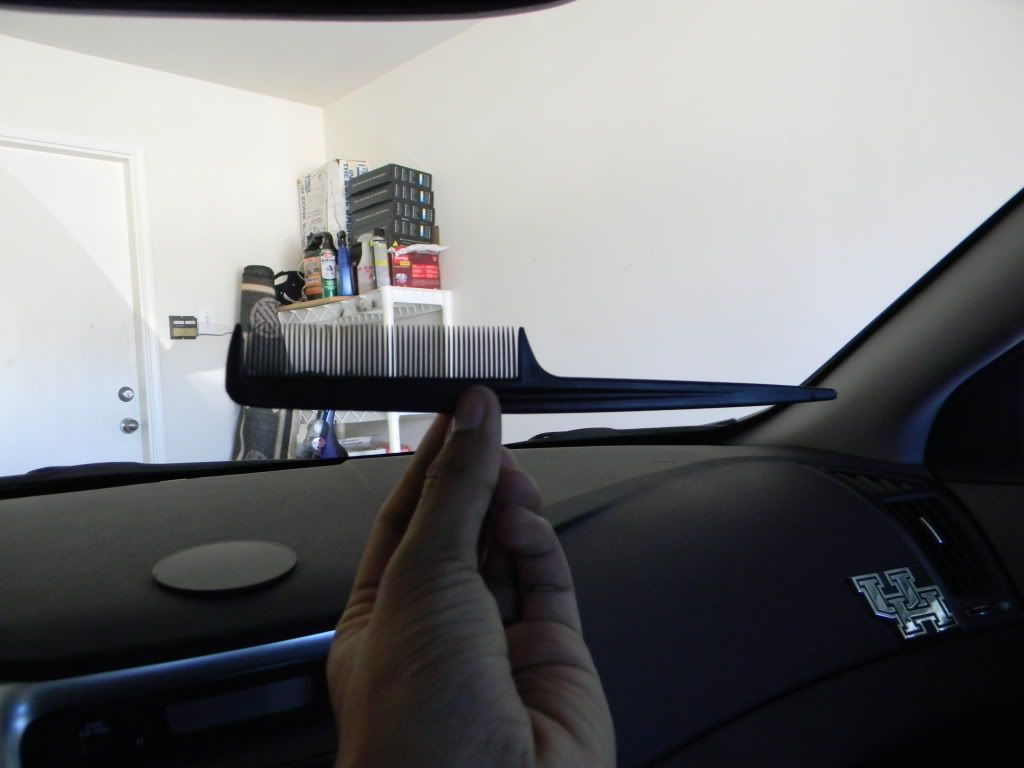
After you take those 2 screws out, you'll need a panel removal tool to loosen this part up, if you don't have one, a comb works well. It will be hard to pull out, once it's a little bit loose, PRY PRY PRY with your fingers, don't worry, nothing should tear or break. Here is a PrecisionLED (XENONSUPPLY) video on how to take this out.
![Image]()
![Image]()
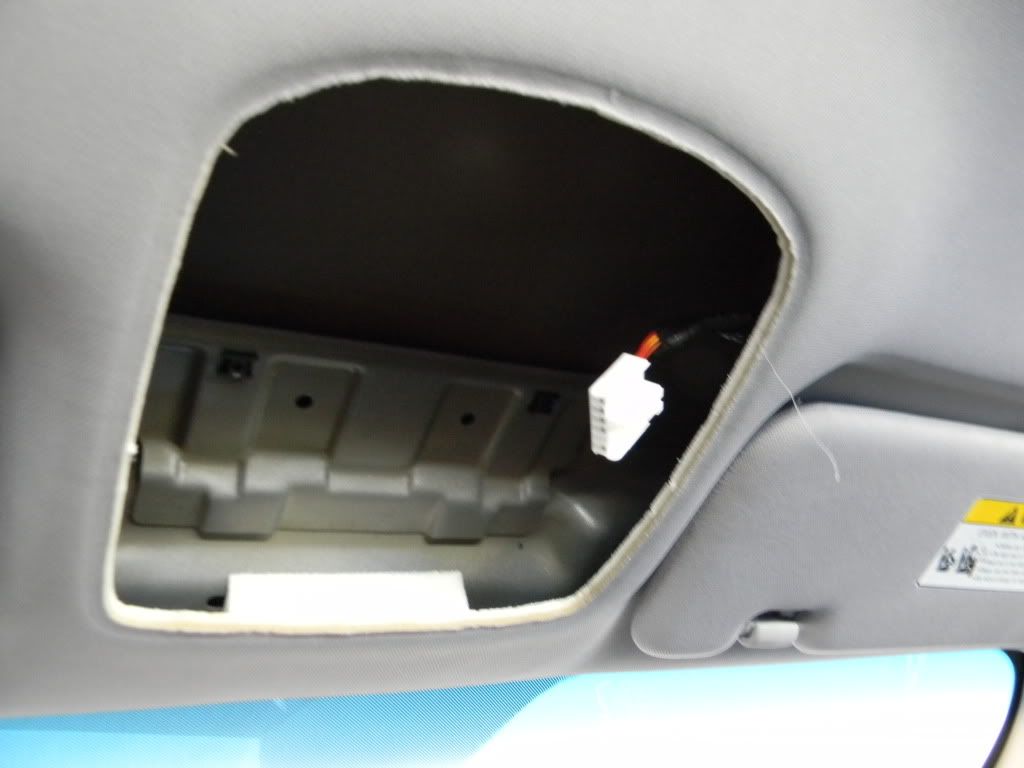
Be sure to remove the harnesses from the sunglasses holder and set it aside. If you have the sunroof, you already SHOULD have the Electronic mirror, if however you DO have the sunroof and DON'T have the Homelink mirror, you'll just have an extra harness in the middle to unplug. No biggie, just be sure you will NOT be tapping into the sunroof switch.
Cool, now you should have a hole in your roof:
![Image]()
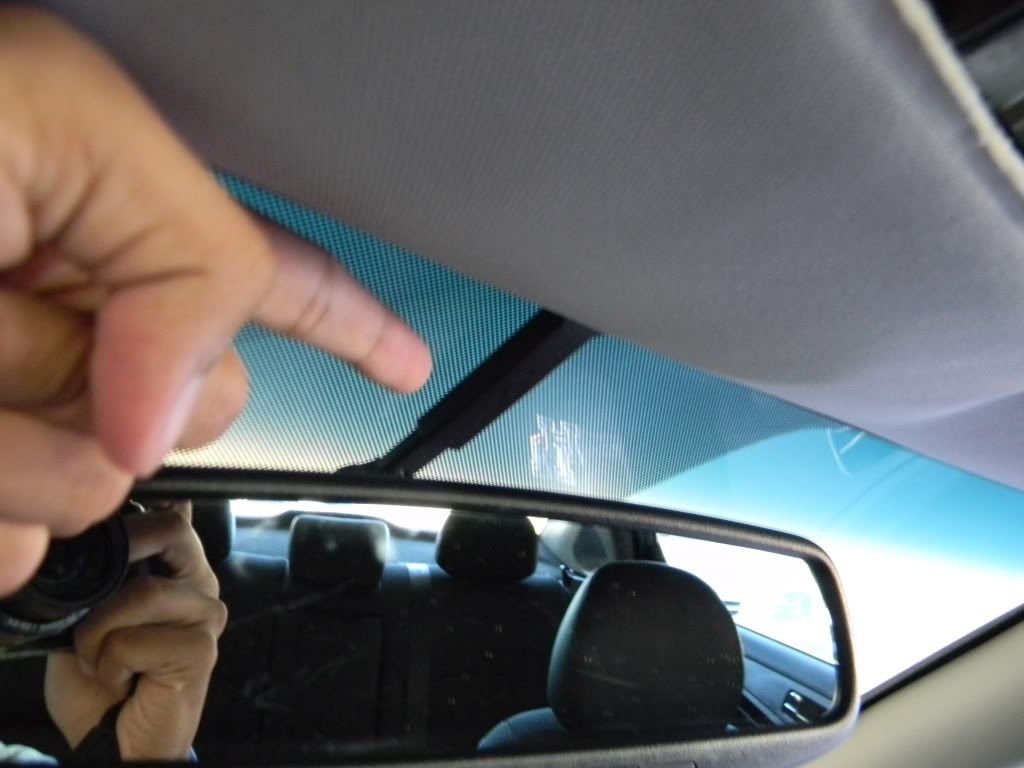
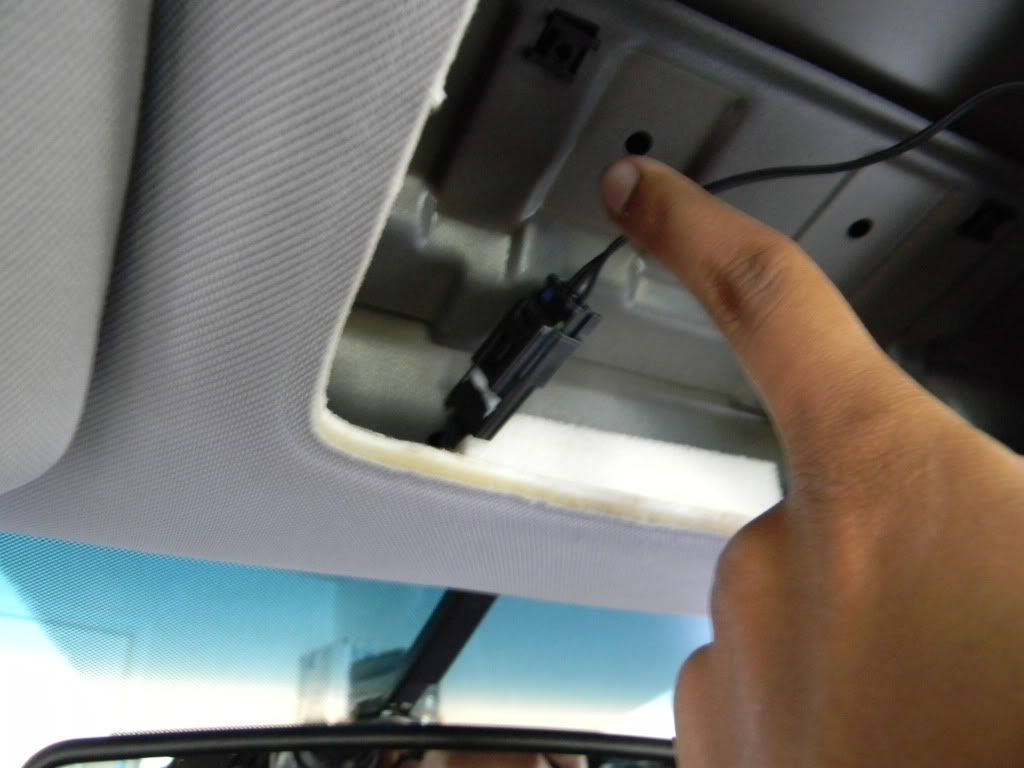
Now carefully pull down the front headliner with your hand gently and pull the power wire from the mirror to the headliner. There is a hole in the headliner where the wire will go, and be sure to put the wire cover above the mirror.
![Image]()
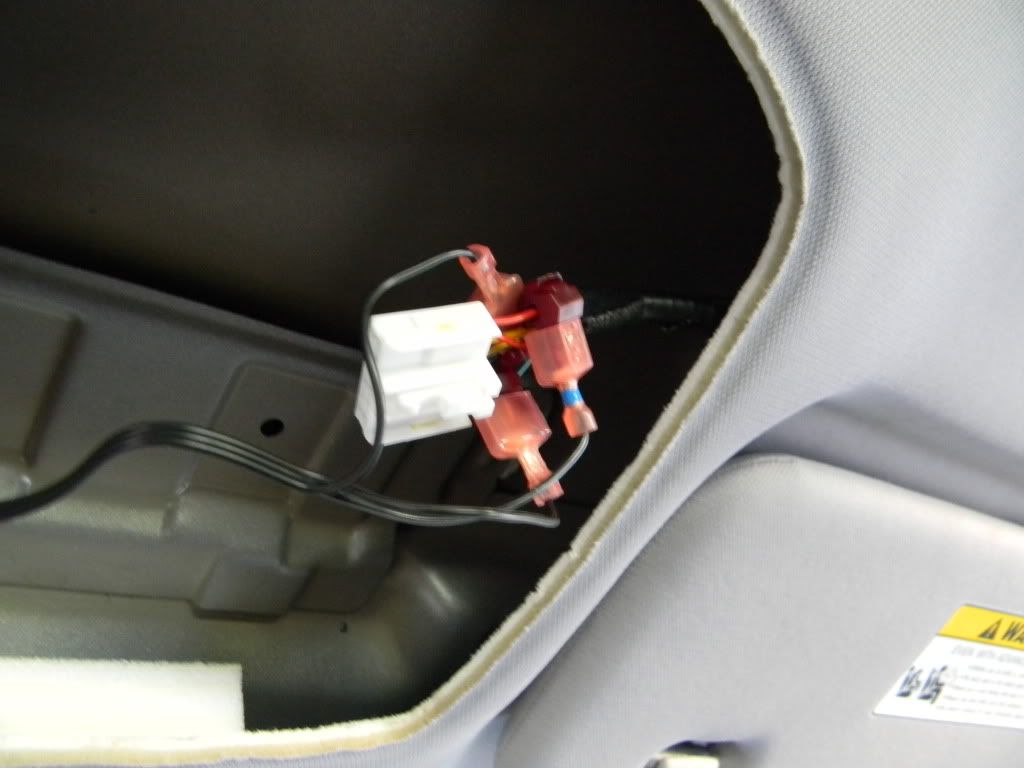
Once you can see the power wire from where your sunglass holder used to be, take the 3 wire harness and plug it into the mirrors wire. It should click.
![Image]()
Now it's time to tap into the cars wiring! PAY CLOSE ATTENTION HERE! Don't worry, it's easy, just follow the instruction.
Put three taps on the following wires: BLACK, BLUE, and RED (the outermost red wire as there are 2)
Place the connector in between the wire and close it PINCHING IT HARD with pliers
![Image]()
Now plug your spade connectors in the following fashion:
The black spade wire WITH a white stripe goes into the BLUE wire tap. (Ignition)
The SOLID black wire goes to the BLACK wire tap. (Ground)
The black wire WITH A BLUE DOT on the spade connector goes to the RED tap. (HOT 12V)
![Image]()
After the connections, plug the ground back into the battery and test for mirror functionality and follow the included guide on how to program your Compass and HomeLink. Carefully push all wires in and place the sunglasses holder back in, don't forget their screws!
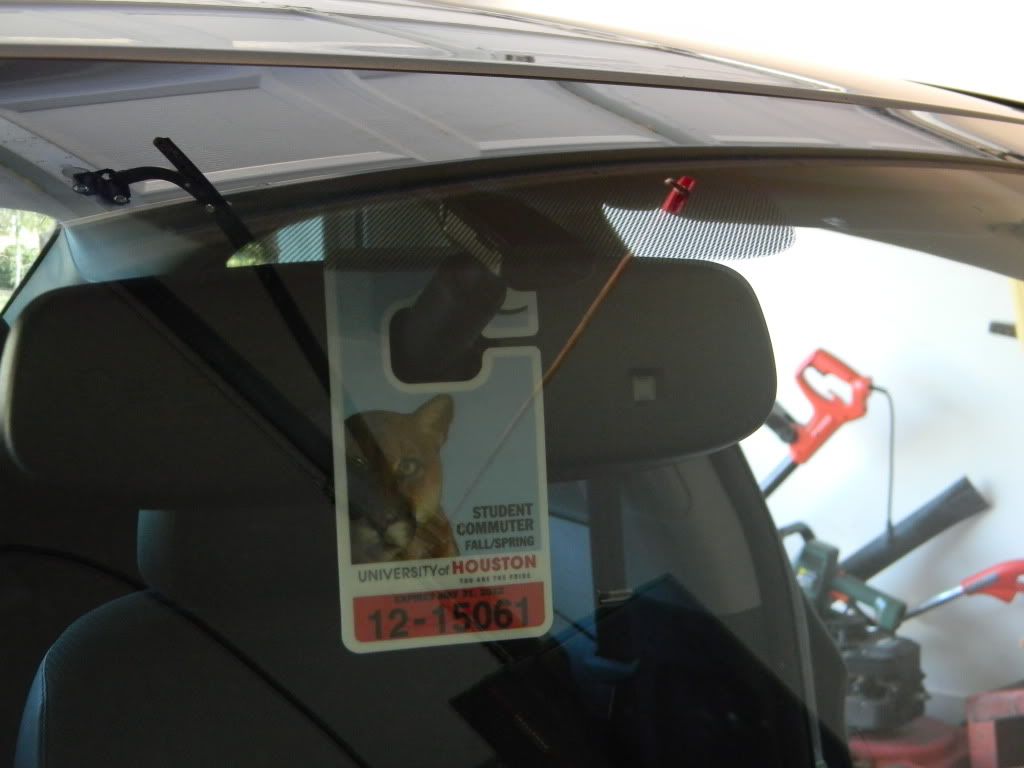
There, now your car looks 10X better and more luxurious! Sit back and adore!
![Image]()
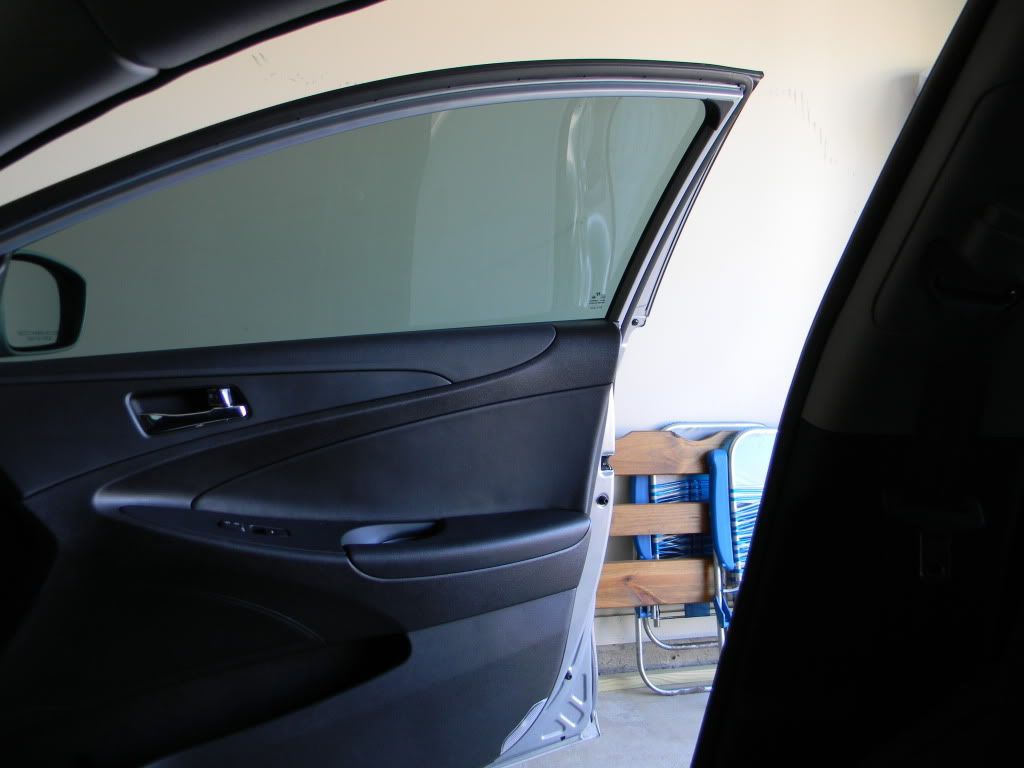
Outside
![Image]()
ENJOY!!!
This past week I bought myself a Homelink Mirror and was searching all over this forum with help for the installation. While I did come across many posts describing how to's and such, there was no true write up, so I thought I'd do one!
Difficulty level: EASY; don't let your dealer install this (unless ofcourse, they're doing for it free!)
NOTE: This is a Genuine Hyundai Part, bought this from my dealership, it retailed at $200
Okay, here are the parts. Here's the mirror, don't be fooled by that plug; this job is 99% plug and play, there's some tapping and crimping to do!
That plug connects to this wiring harness provided, so those 3 spade connectors you see hanging off will connect to the 3 T-Taps.
T-Taps. The original car wires go in the middle, then you close this T-Tap pinched with your pliers, so there is NO cutting or splicing involved.
Now, take off your ground from the battery terminal
Take a good look at your plain mirror, as it'll be the last time you'll ever see it again! Atleast on your Sonata!
Now let's take the old mirror off, you're gonna need a Torx screwdriver to take the screw off underneath the mirror where it attaches to the windshield. I can't remember what number Torx but you head to HomeDepot and buy this tool, it comes with assorted sizes from #2-8 I believe. Used it to swap my XBOX360 hard drives out, came in handy again today. (Any 360 fans here?)
Once that screw is out, the mirror should be really loose and just pull forward and it should EASILY come out, leaving only the metal base plate stuck to the windshield. From here screw the electronic mirror on and tighten it up. Leave its power wire hanging for now.
Oh and at this point, if you forget to roll down the windows and they're tinted windows you obviously can't roll them down now since the battery cables out. The car will be dark so open the doors to let light in. I forgot about that lol.
Now take out the sunglass holder/map lights. Take out your sunglasses and remove the 2 screws holding that panel in.
After you take those 2 screws out, you'll need a panel removal tool to loosen this part up, if you don't have one, a comb works well. It will be hard to pull out, once it's a little bit loose, PRY PRY PRY with your fingers, don't worry, nothing should tear or break. Here is a PrecisionLED (XENONSUPPLY) video on how to take this out.

Be sure to remove the harnesses from the sunglasses holder and set it aside. If you have the sunroof, you already SHOULD have the Electronic mirror, if however you DO have the sunroof and DON'T have the Homelink mirror, you'll just have an extra harness in the middle to unplug. No biggie, just be sure you will NOT be tapping into the sunroof switch.
Cool, now you should have a hole in your roof:
Now carefully pull down the front headliner with your hand gently and pull the power wire from the mirror to the headliner. There is a hole in the headliner where the wire will go, and be sure to put the wire cover above the mirror.
Once you can see the power wire from where your sunglass holder used to be, take the 3 wire harness and plug it into the mirrors wire. It should click.
Now it's time to tap into the cars wiring! PAY CLOSE ATTENTION HERE! Don't worry, it's easy, just follow the instruction.
Put three taps on the following wires: BLACK, BLUE, and RED (the outermost red wire as there are 2)
Place the connector in between the wire and close it PINCHING IT HARD with pliers
Now plug your spade connectors in the following fashion:
The black spade wire WITH a white stripe goes into the BLUE wire tap. (Ignition)
The SOLID black wire goes to the BLACK wire tap. (Ground)
The black wire WITH A BLUE DOT on the spade connector goes to the RED tap. (HOT 12V)
After the connections, plug the ground back into the battery and test for mirror functionality and follow the included guide on how to program your Compass and HomeLink. Carefully push all wires in and place the sunglasses holder back in, don't forget their screws!
There, now your car looks 10X better and more luxurious! Sit back and adore!

Outside
ENJOY!!!


